Implementing Headless Onboarding
This onboarding flow is only available to select white-label partners. Please reach out to your Stream representative to understand if you are eligible.
Overview
This guide explains how to integrate with the Stream Partner API to enable third-party ordering capabilities. The integration flow consists of several key steps:
- Authentication
- Organization Creation
- POS Integration
- Location Management
- DSP (Delivery Service Provider) Binding
- Menu Assignment (optional)
1. Authentication
The API uses OAuth 2.0 for authentication. You'll need to obtain credentials first. Endpoint
// Authentication Request
POST /oauth/token
{
  "grant_type": "client_credentials",
  "client_id": "YOUR_API_KEY",
  "client_secret": "YOUR_API_SECRET",
  "scopes": ["onboarding"]
}

// Response
{
  "access_token": "...",
  "token_type": "bearer",
  "refresh_token": "...",
  "expires_in": 3600,
  "refresh_token_expires_in": 7200,
  "scopes": ["onboarding"]
}
2. Organization Creation
First step is creating an organization for your merchant: Endpoint
POST /onboarding/org
{
  "name": "Merchant Name",
  "provider_id": "YOUR_INTERNAL_ID",
  "user": {
    "email": "merchant@example.com",
    "first_name": "John",
    "last_name": "Doe"
  }
}

// Response
{
  "org_id": "...",
  "user_id": "..."
}
3. POS Integration Flow
3.1. Initialize Integration
Start the POS integration process: Endpoint
POST /onboarding/integrations
{
  "org_id": "ORG_ID",
  "source": "YOUR_POS_SYSTEM", // e.g., "toast"
  "type": "pos",
  "return_url": "YOUR_CALLBACK_URL"
}

// Response
{
  "onboarding": {
    "_id": "ONBOARDING_ID",
    "entry_url": "URL_TO_START_OAUTH", // Redirect user here if provided
    "status": "pending"
  }
}
3.2. Manual Integration
For POS systems that don't support OAuth or require manual integration: Endpoint
- When initializing the integration, if no
entry_urlis provided in the response, proceed with manual integration - Obtain the integration code from your POS system (if you are a POS, this can likely be inferred)
- Submit the code to complete the integration:
PUT /onboarding/integrations/{ONBOARDING_ID}
{
  "code": "MANUAL_INTEGRATION_CODE"
}

// Response
{
  "onboarding": {
    "_id": "ONBOARDING_ID",
    "status": "active",
    "type": "pos",
    // ... other onboarding details
  }
}
3.3. OAuth Integration
For POS systems supporting OAuth: Endpoint
- Redirect the user to the
entry_urlprovided in the initialization response - Handle the OAuth callback at your
return_url - Exchange the OAuth code:
PUT /onboarding/integrations/{ONBOARDING_ID}
{
  "code": "OAUTH_CODE"
}
4. Location Management
4.1. Fetch POS Locations
After integration, get available locations: Endpoint
GET /onboarding/locations?onboarding_id=ONBOARDING_ID

// Response
{
  "locations": [
    {
      "provider_id": "POS_LOCATION_ID",
      "name": "Location Name",
      "address": {
        "address_line_1": "123 Main St",
        "postal_code": "12345",
        "locality": "City",
        "administrative_district_level_1": "State",
        "country": "US"
      },
      "source": "pos_system_name"
    }
  ]
}
4.2. Ingest Selected Locations
Import selected locations: Endpoint
This endpoint imports selected locations and their menu data from the POS system. The data stays synced via POS webhooks after initial import. You can re-sync anytime by calling this endpoint again.
POST /onboarding/locations/ingest
{
  "onboarding_id": "ONBOARDING_ID",
  "locations": [
    {
      "provider_id": "POS_LOCATION_ID"
    }
  ]
}
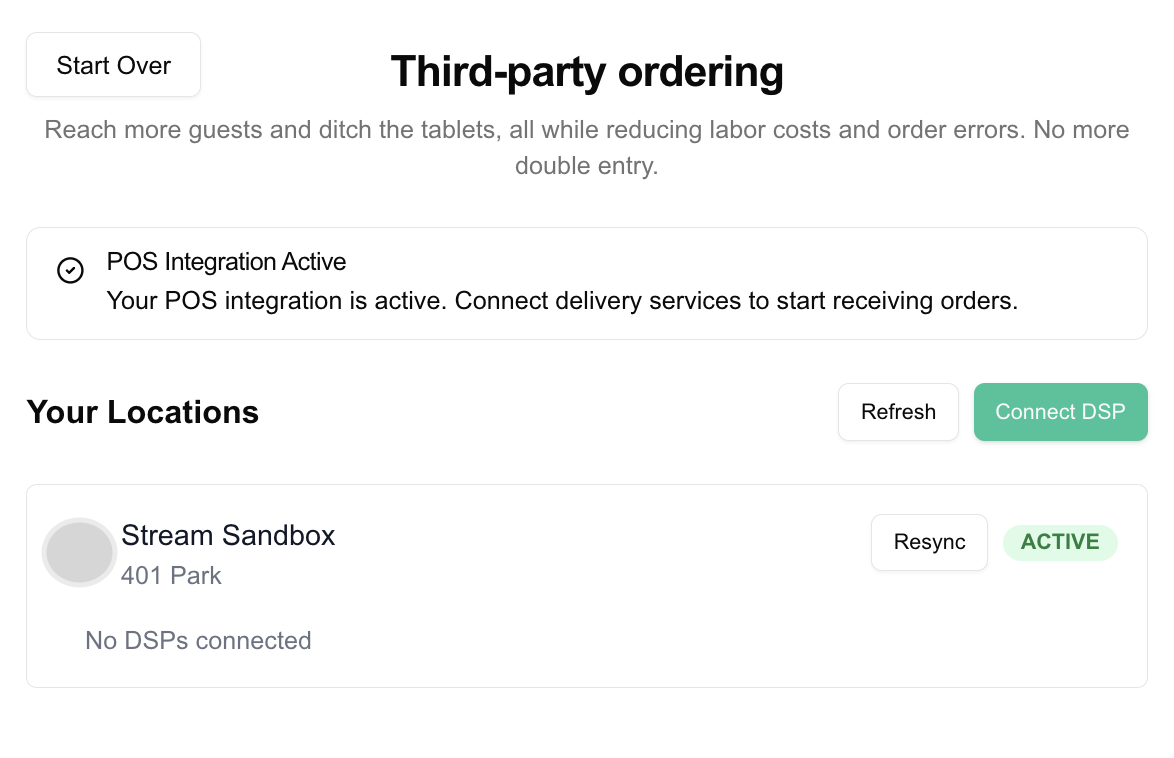
5. DSP Integration
5.1. Start DSP Integration
Similar to POS integration but with type "dsp": Endpoint
POST /onboarding/integrations
{
  "org_id": "ORG_ID",
  "source": "DSP_NAME",
  "type": "dsp",
  "return_url": "YOUR_CALLBACK_URL"
}
5.2. Manual DSP Integration
Similar to manual POS integration: Endpoint
- Initialize the integration
- If no
entry_urlis provided, collect the DSP integration code - Submit the code using the same endpoint as OAuth integration
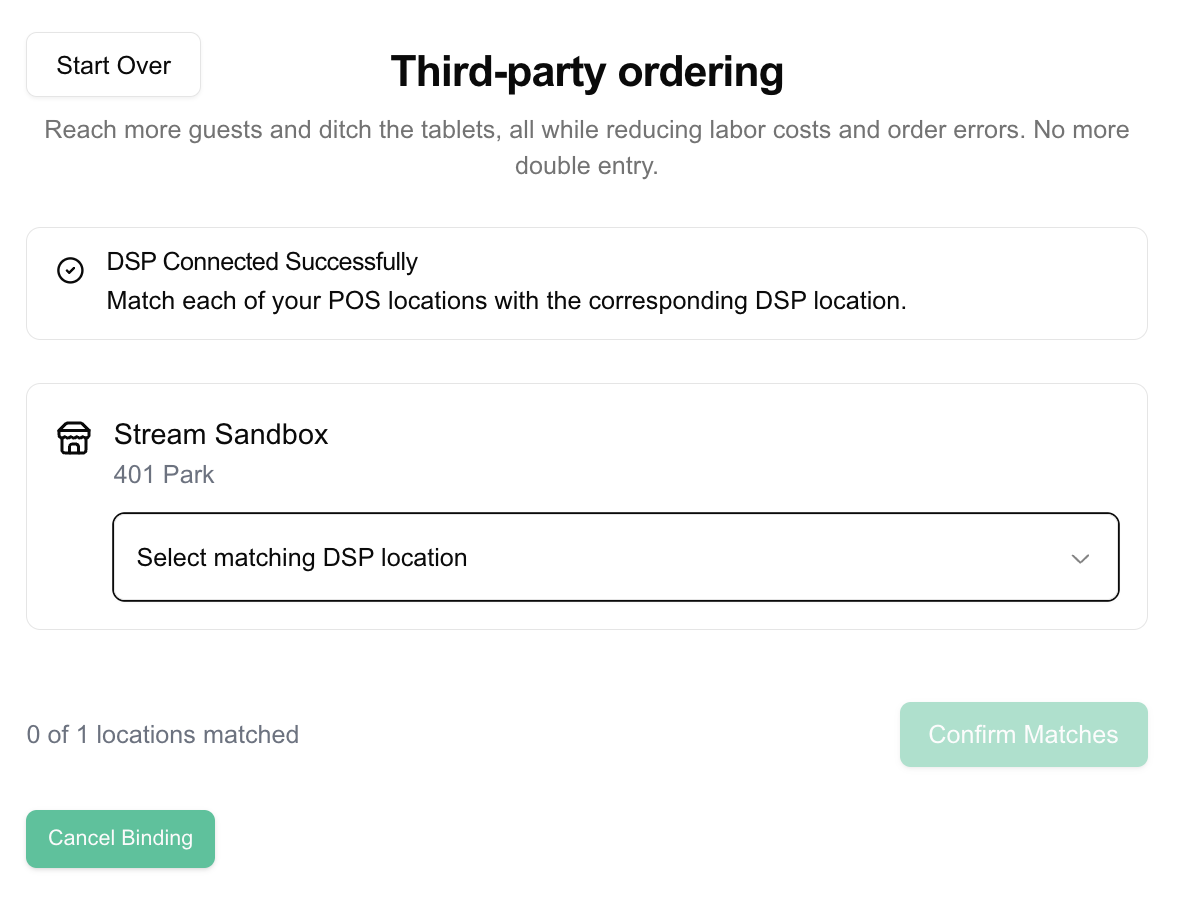
5.3. Bind DSP Locations
Connect POS locations with DSP locations: Endpoint
The binding process creates a link between locations that enables order flow. Getting this mapping wrong can result in misrouted orders.
Recommended UI flow:
- Display POS and DSP location details side-by-side for comparison
- Add confirmation step before saving
POST /onboarding/locations/bind
{
  "onboarding_id": "DSP_ONBOARDING_ID",
  "locations": [
    {
      "pos_location_id": "POS_LOCATION_ID",
      "dsp_provider_id": "DSP_LOCATION_ID",
      "dsp_store_name": "Store Name in DSP"
    }
  ]
}
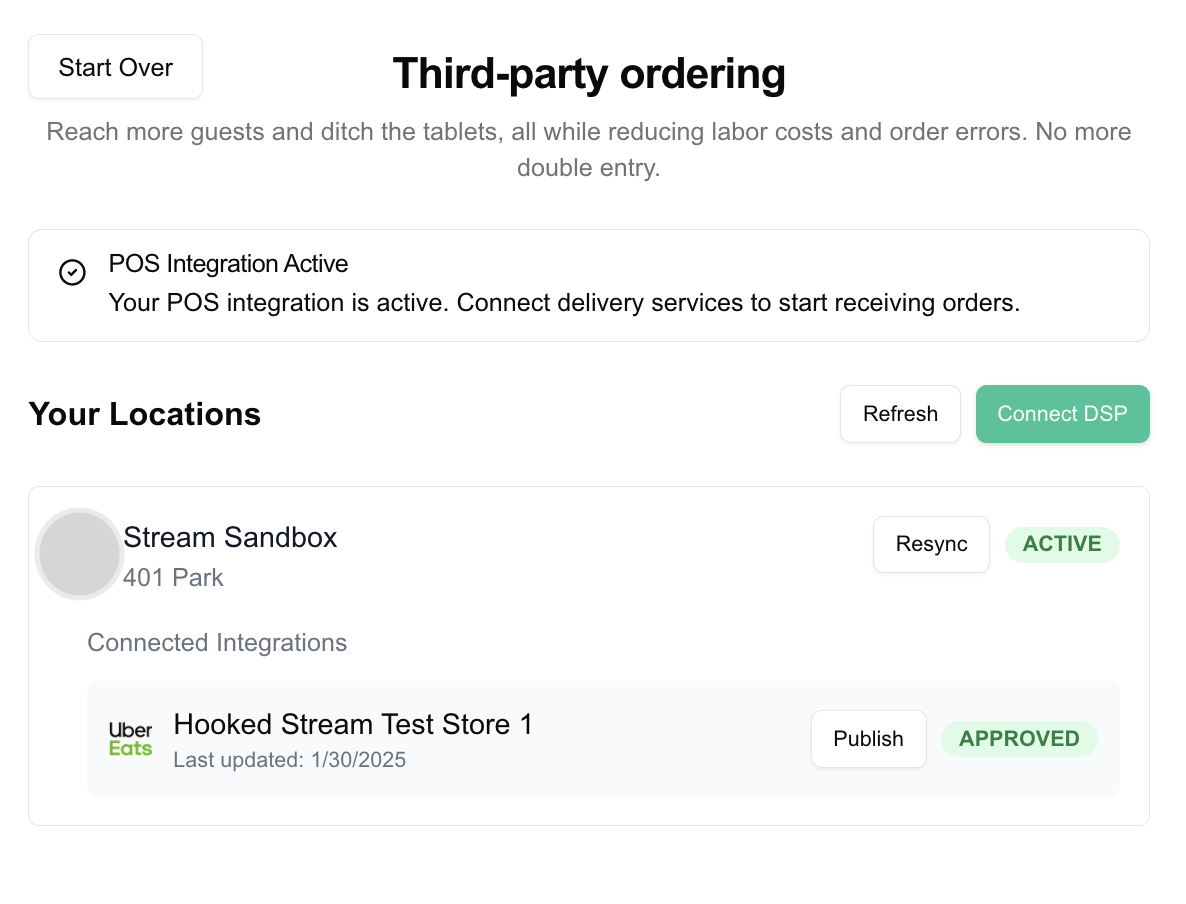
6. View Organization Locations
Get all locations for an organization:
This endpoint provides a way to view the current state of an organization and its locations. You can use it to verify active integrations and location statuses.
GET /onboarding/org/{ORG_ID}/locations

// Response
{
  "locations": [
    {
      "_id": "LOCATION_ID",
      "name": "Location Name",
      "source": "pos_system_name",
      "status": "active",
      "address": {
        // address details
      },
      "dsps": [
        {
          "_id": "DSP_CONNECTION_ID",
          "name": "DSP Name",
          "source": "dsp_name",
          "status": "APPROVED"
        }
      ]
    }
  ]
}
7. Assign Menus to DSP Connections
By default, a catalog update publishes all of a location's menus to every DSP connection at that location. If a specific DSP connection should receive only specific menus, assign them explicitly. Endpoint
- Reference menus by the
provider_ids you supplied in your catalog. - Reference the DSP connection by its
DSP_CONNECTION_ID— thedsps[]._idreturned by View Organization Locations. - Each call is a full replace: it sets the complete list of menus for that connection. Send an empty
menu_provider_idsarray to remove the assignment and restore the default behaviour of publishing all menus.
On the next catalog update, the connection receives only its assigned menus. Connections with no assignment continue to receive all of the location's menus, so existing integrations are unaffected.
PUT /onboarding/menus/assignments
{
  "org_id": "ORG_ID",
  "dsp_location_id": "DSP_CONNECTION_ID",
  "menu_provider_ids": ["MENU_PROVIDER_ID_1", "MENU_PROVIDER_ID_2"]
}

// Response
{
  "dsp_location_id": "DSP_CONNECTION_ID",
  "menu_provider_ids": ["MENU_PROVIDER_ID_1", "MENU_PROVIDER_ID_2"]
}
Integration Status Flow
- pending: Initial state for non-oAuth onboardings
- waiting_for_oauth: During OAuth flow
- active: Successfully connected
- deprovisioned: Integration has been disconnected